is a complex character with an interesting variety of abilities and equipment at her disposal. Time Magic would of course be the bread and butter of this lone warrior, but the ability to equip rods, staves, and knives would also be very useful. The Time Mage has fairly low Strength and Vitality—as would any good magely class—and a decent Magic Power stat that would largely go unused.
Only the main character is nameable in this game, and I chose for him the name of the ultimate Time Magic spell, the very definition of control over time and space, Quick.
Quick had no trouble with the enemies in the Pirates' Cave, and set out immediately for the Wind Shrine to navigate the first dungeon and fight the first boss of the game. Very quickly, I learned the joys and difficulties of the solo challenge.
Before gaining access to Time Magic, the solo Time Mage only has a low-powered dagger with which to deal damage. Many Wind Shrine battles would be quite threatening for this low-offense character. The White Snakes inflict Paralyze status, which is inconvenient for a party but can be deadly for a single character. Many battles came to a slow, painful end as Quick sat paralyzed and re-paralyzed by these snakes and other enemies plinked away at his meager HP total.
Even worse, when Quick reached level 7, the Black Goblins' Goblin Punch ability became a one-hit kill for Quick. Goblin Punch has the curious property of an eightfold damage multiplier when both the caster and target are the same level. The attack power of Goblin Punch is equal to that of the caster, so this ability scales up and is equally deadly as the game goes on. I would have to keep careful track of my level for this and several other level-dependant spells and abilities that are devastating to the solo character.
The nuts and bolts of this game are full of obscure intricacies and synergies that are never realized by most casual, full-party runs. For its time, this game was incredibly well-designed and balanced. True, many of the discovered bugs and quirks were probably not intended to be found or used by players on the Super Famicom in 1992, but they still hold up incredibly well. Playing through the game with the restrictions of a solo character with a limited equipment and skill set allows (or forces) the player to discover alternate paths to victory.
Once Quick was beyond level 7, the Goblin Punch was no longer a killer, and Quick could fight more battles before healing with potions. The ManiWizards were the only threatening enemy, as they cast elemental spells on their third action. Quick still ran from those battles, but heartily fought the Mold Wind enemies, which have a 1/16 chance to drop Elixirs, of which Quick would need several very soon.
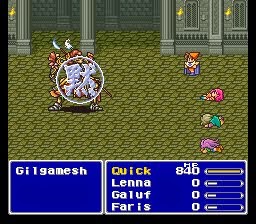
The first boss, WingRaptor, was easily defeated by attacking with the wings open and healing with the wings closed. With a full party of freelancers swinging Broadswords, Wingy usually goes down before the wings-closed form appears on its third action, but Quick required several cycles to whittle down its 250 HP.
Once WingRaptor was defeated, the Torna Canal opens, and the next plot event can take place. After a brief sail through the canal, the party encounters a nasty crustacean monster, Karlabos, with a number of solo-crushing attacks.
Full parties usually have no trouble depleting the 650 HP of this lightning-weak boss before its nasty abilities can do much damage, but not so the solo, low-offense mage. Karlabos has three abilities: Fight, Tentacle (inflicts damage and paralyze), and Tailscrew (inflicts Weak status, reducing the character to single-digit HP). Even at low levels, Quick would have enough HP to survive a toe-to-toe bout with Karlabos if it only used its Fight command. Adding paralysis from Tentacle would be nasty and inconvenient, but not instantly lethal. Tailscrew—especially when combined with paralysis—is the real killer of this fight.
On its first turn, Karlabos has 1/3 chance to use Fight, 2/3 chance to use Tentacle and paralyze. On turn two and three, it has an equal chance of using Fight, Tentacle, or Tailscrew, after which the script cycles back to its first turn. Making this boss even more tricky for the solo is its slightly-faster-than-average speed, guaranteeing it the first action of any fight.
Many Karlabos battles would go as follows: Tentacle (paralyzed), Tailscrew (reduced to single-digit HP...and still paralyzed), Fight. Quick would be on the deck having taken no actions. To survive this battle, Quick would have to avoid the Tentacle/Tailscrew combination, healing with Elixirs while inflicting as much damage to the boss as possible. To handle this, I would need to rely on more damage, more Elixirs, and some luck.
Thankfully, the Mold Wind enemies offer an unlimited supply of Elixirs to the patient grinder. Quick needed the levels and AP (job ability points) anyway. After pulling four Elixirs, Quick sailed back into the canal to fight the various sea monsters before Karlabos. These monsters only target female characters with their attacks—an obscure plot clue that Faris the Pirate is really a woman passing as a man—so Quick could hack away without being targeted by their attacks.
To help my dungeon crawling move more quickly, I thought it would be slick to make one of the dead characters a Thief to get access to their innate "Hold B to dash" ability. After a few battles, I remembered that Thieves also have an innate "no back attacks" ability that would be unfair to exploit. To give me access to faster map movement, I made Quick a Thief to pick up enough AP to learn and transfer Dash, which I equipped and never removed.
All this Elixir-collecting and Thief-building took Quick to level 20, nearly the levels at which a party would be nearing the end of the game. These levels helped Quick in two ways: more damage with the measly Dagger weapon, and higher resistance to Tailscrew.
I calculated my front-row Dagger damage would be 70-85 for each attack using the knife damage formula. From J. L. Tseng's Algorithms Guide:
Attack = Weapon Attack + (0..3, a random number between 0 and 3)
M = (Level*Strength)/128 + [(Level*Agility)/128]** + 2
Damage = (Attack-Enemy Defense)*M
**
The Agility multiplier is bugged, and will equal 0 if the result of the calculation is even and 1 if the result of the calculation is odd. Thanks to T-Hawk for providing the easy explanation of this bug.
Working through the formula for Karlabos, my Level was 20, my Strength 23, my Agility 27, and the Weapon Attack of the Dagger is 14.
M = (20*23)/128 + [(20*27)/128]** + 2
The Strength calculation is 3.59, truncated to simply 3 with the game's round-down math. The Agility calculation is 4.22, which is truncated to 4 and reduced to 0 due to the bug. Adding the bonus 2 gives Quick a multiplier (M) of 5.
Karlabos has no Defense, so my lowest damage will be 14*5 = 70; my maximum damage will be 17*5 = 85. I was happy to see my calculations come out correctly in the first battle at level 20.
As a side note, had the Agility multiplier been calculated correctly, Quick would have had an M of 9, doing 126 base damage instead of 70, nearly as much as a Level 20 Knight with the Broad Sword with base damage of 135!
The high levels also granted Quick a much better resistance to Tailscrew. Looking back to the Algorithms Guide, status-inducing magical attacks like Tailscrew follow this formula for their chance to hit:
Spell Accuracy + Attacker Level - Target Level = Hit %
Magic Evasion is a separate check, and will be covered later.
This is a really elegant formula, ensuring that low-level casters have a difficult time landing spells on superior opponents. Let's plug in some numbers and see our chance to resist Tailscrew.
Tailscrew Accuracy 99 + Karlabos Level 5 - Quick Level 20 = 84%
It's easy to see that the higher levels grant Quick a significant chance to avoid Tailscrew landing and reducing him to critical HP. At normal party levels in the single digits, Tailscrew will land nearly every time, but at level 20, Quick had a 16% chance to watch the boss waste a turn on a useless spell.
With my higher damage and resistance in hand, Karlabos fell after a few restarts...and five Elixirs.
After the brief dungeon following Karlabos, Siren awaits. As the player should have learned with the WingRaptor battle, some bosses have different forms. Siren herself begins the battle in a human form that casts buffing and attack magic before switching to a (slightly more gray) undead form that deals strong physical damage and—crucially—inflicts poison with a special attack. Antidotes are not available to purchase in the first village of the game, so the only poison cures available are the few available in chests. Once Quick was out of Antidotes, he would be helplessly bleeding HP every round of battle.
I tried many different approaches to Siren, most of which had Quick in the front row desperately slashing Siren with his Dagger, hoping to whittle down her 900 HP before biting the dust himself. Predictably, these plans failed.
Siren has access to both Haste and Slow herself, before Time Magic is available to the party. Landing Slow on a solo, low-offense character like Quick would be an almost instant reset; with Siren acting at double speed, she would crush Quick with her magic and attacks.
On her first turn, she is programmed to cast either Mute, Slow, or Haste—effectively ending the battle in the first round in two thirds of my attempts. When she began with a useless Mute spell, I tracked my front row Dagger damage to see how close I could get before being wiped out.
When she morphs to her undead form, it isn't just her sprite color pallette that changes. Her physical defense goes from 0 to 12, her attack damage increases dramatically, she develops a weakness to fire and takes damage from healing items, and has a chance to inflict poison with a special attack called Bear Hug. Of all Siren's attacks, poison was the worst for an ill-equipped Quick.
When in poison status, the character suffers damage equal to (Max HP / 16) each round. It works like Regen (which will be covered later) in that it scales up with higher levels. This was acutely felt by the level 20 Quick, as poison damage was inflicting almost as much as a Siren's attacks. Quick could keep up on healing damage taken from Siren's physical and magic attacks, but once the Antidotes ran out, with only Potions and a few Elixirs for healing, he quickly succumbed to the slow drain. This was another painful lesson I learned about solo challenges: status effects that are minor nuisances in a full party can be devastating and can NOT be ignored.
But there's always a solution in
Final Fantasy V.
Earlier in the Ship Graveyard dungeon, a well-hidden chest contains a new kind of weapon. The Flail has some very interesting qualities: it boasts a slightly higher Attack (16) than the Dagger (14), it deals equal damage from the back row, and it cuts the enemy defense to 25% of its original value.
What's the catch? The weapon is wildly random, both in Hit% and damage dealt. Here's the formula from the Algorithms Guide:
Attack = (Weapon Attack/2) + (0..Weapon Attack)
M = (Level*Strength)/128 + 2
Defense = (Defense/4)
ATTACK: 16
HIT%: 70
The above Attack formula means that, on any given attack command, the Attack value will be anywhere from 50%–150% of the listed weapon Attack. For the Flail, that means 8–24. The Multiplier (M) will usually be the same as that with the Knife (due to the bug), and the Defense/4 property boosts damage significantly.
The Hit% of 70 means just what it says on the tin: this weapon will flat-out miss on three of every ten attacks—before calculating any enemy physical evasion, of which Siren thankfully has none. I like the narrative suggestion with this mage-only weapon: picture a frail robed wizard wildly and blindly swinging a spiked ball on a long chain with one hand while protecting his face and eyes with the other.
Against Siren's human form, I found that Quick could do up to 120 damage with each swing—from the back row. This boost in damage dealt and reduction in damage taken was the key to victory. With some restarts to line up the luck factors—mostly avoiding Haste and Slow on the first round and landing Flail hits with decent damage—Siren went down with only two Elixirs that might have been saved had I been able to stock up on Antidotes before entering the Torna Canal.
After Siren, we can finally visit the town of Carwen to stock up on Potions (and Antidotes), upgrade the armor, and pick up the well-hidden Ice Rod in the box near the dock. The only other place to go is the North Mountain, to collect the Wind Drake. Near the top of the mountain, Quick encountered the game's first double boss, Magisa and her husband Forza.
As their names suggest, Magisa is a magic-user and Forza is a massive physical tank. The battle begins with Magisa, who summons Forza to battle when her HP drops below 300. Quick could easily handle her magic damage, and could hold his own with the Dagger or the Flail, but not so when Forza came a callin'.
Forza has a regular physical Attack of 14 and a multiplier of 9. In the back row, Quick could halve this M to 4, but Forza has a Tackle that deals 1.5 times damage, well outpacing Quick's healing with Potions. Magisa was easy to handle, even after Forza showed up, but Forza's physical damage was too much for an ill-equipped Time Mage without access to his Dimensional powers. I took the easy way through this boss, just to move things along.
_%5BT%2BEng1.10%5D145.jpg)
_%5BT%2BEng1.10%5D146.jpg)
Equipping and using the Ice Rod in battle breaks the rod to cast Ice3 on all enemies. This early-game access to high-level Black Magic is interesting and, of course, very helpful. Breaking the rod on Magisa deals well over twice her total HP in one shot, killing her before she can even summon Forza. Rod-breaking is the only way for the Time Mage to do significant, multi-targeting damage at this point in the game, but not really part of the Time Mage play style. Thus, I would use rod-breaking sparingly throughout the rest of this game. Once Quick had access to Time Magic, rods would actually become mostly unnecessary.
Speaking of Time Magic, the Wind Drake at the top of the North Mountain gives us access to the town of Worus, and the first Dimensional Magic spells of the game: Haste, Slow, Regen, and Void.
Let's finally talk about how battle time works in this game. The Active Time Battle (ATB) bar of all actors in a battle—allies and enemies—increases at a constant rate. When the ATB value of any actor reaches 255, he/she/it can take an action. After taking a turn, the ATB bar is reset to a starting value between 0 and 255 and begins to count up again. This starting value is calculated based on Agility with an extra calculation for equipment weight, that Quick would never have to consider with his light armor. The higher the starting ATB value, the sooner the character can act again.
Here's the calculation, with thanks again to the Algorithms Guide:
N1 = 120 - Agility* + (Equipment Weight / 8)
Starting ATB = 255 - N1
*
Agility is called Speed
for enemies, and enemies ignore Equipment Weight, but the calculations are otherwise identical.
N1 is the number of ATB "ticks" required between actions. The fewer ticks required, the faster turns will come. For example, Quick's Agility is 27, and Forza's Speed is 37. Quick's N1 would be 93, and his starting ATB value would be 162. Forza's N1 would be 83, and his starting ATB 172. This means that Forza will get a turn 10 ticks sooner than Quick on the first round, and about every eight rounds, Forza will be able to act twice before Quick can act once. Enemies with significantly higher speed than a solo character can be incredibly dangerous...but the Time Mage has the power to control these things.
When a character is in Haste status, N1 = (N1) / 2; when in Slow status, N1 = (N1) * 2. With Quick's 27 Agility, his N1 would become 41, and his starting ATB 214, every round. Forza with Slow would have an N1 of 166, and a starting ATB of 89. Had Quick been able to use these spells in the Forza fight, he would have had several turns before Forza would have had one. This speed advantage would be the core of almost every battle for the rest of the game.
The third pillar of the first-level Time Mage spellbook is Regen. What an elegant spell to include in the Dimensional Magic category, what synergy it has with Haste and Slow. Many would consider a spell like this to be more in the White Magic variety, but I agree with the designers of
FFV, and I like it right here with the Time Mage.
When in Regen status, the character recovers (Vitality * Level) / 16 HP per turn. Like poison, it scales up with character level, and thus is always worthwhile. That it recovers the HP
each turn is the beauty of its inclusion in the Time Magic book. Haste speeds up the Regen process, and when combined with enemies under Slow, allows the character to recover nearly all damage taken in most random battles. In nearly every single battle from Worus to the final encounter, I would begin with Haste, Regen, and Slow.
Void is an interesting spell that negates the casting of all magic by enemies and allies for the rest of the battle. After casting Haste, Slow, and Regen, the Time Mage can Void out all enemy magic while she goes to town with her knives and staves. Sadly, this spell fails in most boss battles, and I tend to run from most of the more dangerous random encounters, so I didn't get much use out of this spell in this playthrough.
Let's take these new spells for a ride against Galura, the next boss fight. This unruly pachyderm is a purely physical fighter, and packs quite a punch. On its regular actions, it does nothing but Fight, but once its 1200 HP drop below 800, it adds a one-two punch counterattack to its regular script, responding to any HP damage with either one or two successive counters—in addition to its regularly-scheduled Fight command.
Even with a party, Galura can be quite a handful when spreading out its heavy attacks, one of which inflicts HP Leak status, but solos really have to be careful about damage and healing with this aggressive boss...unless they have Time Magic!
Without any Haste or Slow adjustments, Galura is noticeably faster than a Time Mage (31 Speed to Quick's 27 Agility), but Haste and Slow rebalances the scales in a big way. When combined with Regen popping off three or four small healings for each of Galura's regular attacks, the beast could never keep pace in a damage race.
The only small threat came from its counterattacks, which are triggered whenever it takes damage, and were thus happening as quickly as Quick was bashing it with the Flail from the back row. Once these counters kicked in, Galura was able to outpace the healing from Regen, but not quickly enough. I confidently held the A button, trading blows with Galura until it went down. Quick had 111 HP remaining, almost close enough to make me worry...almost.
As a quick plot note, this is the point in the game at which the Time Mage job officially becomes available—defeating Galura causes the Water Crystal to shatter, and the party to gain access to this second set of jobs. This is why Time Magic and Summons are not available until this point.
I must now admit a minor mistake. After getting the Wind Drake, the party can return to Tycoon Castle (near the first meteor) to collect some very valuable treasure, including the Heal Staff. This weapon is only equippable by a few magely classes in the game, and casts Cure 2 when used as an attack weapon—for free. For a Time Mage without access to Cure spells of any kind, this would be very, very valuable. I, sadly, forgot to run to Tycoon to pick it up, excited as I was to take on Galura and the next part of the game.
After Galura and the fall of the Worus Tower, a gate opens up in a newly-fallen meteorite to a new continent. Here, the Kingdom of Karnak is drawing power from the Fire Crystal to fuel their economy and power their famous Fire Ship. After convincing the king that the Crystals are in danger, the party has to navigate a monster-packed ship to the engine room, where Queen Karnak has been possessed by a fiery spirit and must be defeated.
Liquid Flame has three forms: Humanoid, Tornado, and Hand. Each form has a simple AI, and each form responds to damage with a counterattack and a form shift. The Humanoid and Hand forms attack with physical attacks and fire magic, and the Tornado form will endlessly cast Fire 2 on itself for healing.
Standard solo procedure (laid down by Sullla and others) is to let the Tornado form run out of MP casting Fire 2 before going on the offensive, attacking the Humanoid and Hand forms and healing while the Tornado uselessly tries to heal itself. This is when the Heal Staff would have come in handy for Quick, but he sat back drinking potions and relying on Regen instead. It took a little longer, but there was never any real danger.
Interestingly, Quick also ran the Hand form out of MP, as it casts Fire 2 as its counterattack. This is the life of the low-offense solo Time Mage.
Immediately after the Liquid Flame battle, the Fire Crystal explodes, and Karnak Castle begins to crumble, giving the party ten minutes to escape. Some nice treasure can be grabbed here in the escape sequence, but many of the chests are guarded with time-consuming monsters. Quick was able to pick up everything in the castle except one Elixir, using Haste to quickly bash and slash the enemies guarding the chests. Many of these battles include wolf-like Nakk enemies, which will execute a Flee if they are ever left alone in combat, so the low-offense character can save some time by killing the companion enemies in a fight and allowing the Nakk to run. Quick avoided the Iron Claw boss at the end of the castle by killing its first form before it transformed, and escaped with three seconds left on the clock!
_%5BT%2BEng1.10%5D191.jpg)
The two big treasures in the castle sequence are the Guardian and the Elf Cape. Guardian (known as Hunting Knife and Main Gauche in other translations) is a knife weapon with a greatly-improved Attack and the innate ability to parry 25% of all incoming physical attacks. The Elf Cape is even better, providing a bonus point of Agility and a 33% chance to parry physical attacks. Even better, these protections stack with each other! The game first checks for the Guardian, and if it fails to parry, the game then checks for the Elf Cape.
Suddenly, this lowly Time Mage was a traditional rapier-and-cloak fencer, delivering good slashing attacks in the front row while blocking most incoming attacks with cloak or dagger. Damage from blows that did land was healed away by Regen and Haste.
The Ancient Library throws two different bosses at the party: the fire-elemental summon Ifrit and the beast-in-the-book Byblos. Ifrit throws around physical attacks and fire damage, but the killer combo of Haste, Slow, and Regen—and my newly-found Healing Staff, finally pilfered from Tycoon Castle—made this battle a breeze.
Before heading into the Ancient Library, I picked up the two new Time Magic spells available in Karnak: Demi and Stop. Both of these are very useful, both for the party and for the solo run. Stop does just what it advertises: enemies hit with Stop have their ATB frozen and all actions—including counterattacks—are halted. The spell has a base 90 Spell Accuracy (using the same level-adjusting formula as Tailscrew above) and stops (most) enemies for (180 + (Attacker Level / 4)) ATB ticks. For reference, a Hasted Quick gets to act every 41 ticks of the ATB bar, so an enemy hit with Stop would stay halted for about four actions of Quick.
Demi is a gravity spell (not really an element in this game, as it would be in later
Final Fantasy installments) that deals percent-based damage to its target. When it successfully lands (99 Spell Accuracy, most bosses are immune), it removes one-half (calculated as 8 / 16) of the current HP total of the target. In English, "demi" as a prefix means "half," and is sometimes combined with "semi" to indicate "half-of-half."
Many bosses in
Final Fantasy V are flagged with a special bit of code, most commonly called "Heavy" in English. Enemies listed as being Heavy are granted automatic immunity to many easy kills (like Demi spells) and have shorter durations for Stop, Paralyze, and other limited statuses.
Many bosses does not mean all bosses, and Byblos would be the first victim of Demi.
Its 3600 HP were halved, then halved again, and again, until Quick was able to finish the job with a physical strike—Demi will NEVER reduce an enemy to 0 HP. Byblos is normally a difficult boss for solo characters, with its ability to use Slow on your party, Protect on himself, and Drain spells when his health is low, but Quick had little trouble taking it down.
At this point, Quick did some fighting for a few extra levels and enough gold to buy a Flame Ring, a very important accessory for later in the game, and proceeded to the Sandworm. This enemy functions like a game of Whack-a-Mole; the worm moves from hole to hole, and the party must target carefully. Striking an empty hole (or using all-targeting spells or abilities) triggers a counterattack—a Demi spell. Sandworm, like so many bosses, is vulnerable to Slow, which keep it in place longer and slows its attacks. Quick cut it down with the Guardian, taking the back row penalty on every hit, as the worm is always coded as a back row enemy. Regen healed away any damage—including some Demi from ill-timed attacks—but there was no danger.
A few boring plot points later (something about the ghost of King Tycoon, Cid and Mid on a Black Chocobo...), the party picks up an airship, but first must clear the deck of the parasitic Crayclaw, Karlabos' older sibling.
But now, armed with Haste and Slow, Tailscrew was no problem! If it landed, Quick would get a turn (or two, or three) before Crayclaw could deliver the follow-up killshot. Physical evade from the Elf Cape and Guardian further protected Quick from Crawclaw's physical attacks.
The physical evade equipment was equally valuable against AdamanTiMi (Adamantium Tortoise), the next boss. This turtle boasts huge defense and equally huge physical attack damage. It smacks parties with double attacks, and really quickly pours damage into a solo target. It begins every battle in Protect and Shell status which, when combined with its sizable natural defense ratings, makes dealing direct damage a tough prospect. Thankfully, this turtle isn't Heavy, and is thus vulnerable to Demi spells.
Demi dealt 1000, 500, 250, 125, and onward until Quick ran out of MP. The rest of the battle played out trading weak dagger attacks with massive turtle smacks—many of which were dodged with the Elf Cape/Guardian combo.
The next dungeon—an ancient floating city—is guarded by mechanical enemies and a huge boss cannon. The Flameguns deal fire damage, which was healing Quick, who had equipped the Flame Ring. The Rocket enemies use Confuse attacks, but are vulnerable to Slow and Demi, so they went down with a bit more effort.
_%5BT%2BEng1.10%5D239.jpg)
_%5BT%2BEng1.10%5D241.jpg)
Sol Cannon is the big guardian of the flying city. It has three targets: two Launchers and the main cannon. The Launchers have an attack that inflicts Old status, one of the worst afflictions in the game. Quick would later get access to this spell himself, but quickly, Old causes character stats to slowly tick down, resulting in greatly reduced speed and damage. Without saving up another 50,000 gil to buy an Angel Ring, Quick would have to kill both launchers (800 HP) before they could fire their aging rockets. For the second time in the game, Quick pulled out a Thunder Rod to kill the Launchers, relying on a bit of luck from the random damage range to deal lethal damage to at least one of them on the first round before finishing the job on round two.
The main Sol Cannon does only one thing: Surge Beam. This all-targeting attack deals one half of max HP, regardless of magic defense or any other protection. It also inflicts HP Leak status, leaving life slowly ticking away. Luckily, the beam takes several rounds to charge—leaving plenty of time to heal up and go back on the offensive. Even better, the cannon can be Slowed, putting the brakes on its Surge Beam charging so Quick could slash it down with the Guardian.
At the end of the floating city dungeon, the form-shifting ArchaeAvis gave Quick his most interesting fight yet. This dino-bird has five forms, each with its own HP total, different stats, and different elemental attributes. The first four forms shift invisibly after being depleted of HP, giving the player the impression that the boss, according to the pre-fight dialogue, "...can shift its weakness at will!"
After the invisible form shift, all statuses are reset, as each form is technically a different enemy. All forms are vulnerable to Slow, so the standard plan was to attack, attack, attack, while resetting Slow on each form. Sadly the first few forms have high physical defense, so damage output with the Guardian was low.
Interestingly, two of the first four forms are not Heavy, so are vulnerable to Demi. I made sure to take advantage of this free massive damage on these forms. The Flame Ring nullified the ice attacks and absorbed the fire attacks from those two elemental forms.
After the first four forms, ArchaeAvis "dies" and is "revived" as its final form. It nullifies all elemental attacks, but finally takes good physical damage. Slow kept it under control while Quick carved it up with the Guardian, which helped block its confusion-inflicting Claw attack.
Before finishing the first chapter of the game, Quick cleaned up the trio of mini-bosses at the meteors. The trickiest of the three is the six-pack of Puroburos, bomb-like enemies that can use Self-Destruct and cast Life 2 when killed normally, fully reviving all of their dead brethren. The best way to handle this gang is to kill all six in one blow, watching as they all cast Life 2 uselessly on their technically-still-living companions before expiring at the same time. Once again, broken rods gave Quick the all-targeting attacks needed to deliver six simultaneous killshots.
Titan is a mostly physical fighter, whose HP are easily cut down. The danger he poses to a party is his final attack, Earth Shaker. This all-targeting spell deals healthy damage to the entire party, more than most parties can easily handle at this point in the game. Solo characters, thankfully, have plenty of HP to tank the 400 damage dealt by this attack. Titan went down without a fuss.
Another party-killer is Chimera Brain (Manticore), whose Aqua Rake attack can deal nearly as much damage as Earth Shaker. For lower-level parties, this is quite dangerous. For Quick, this Chimera went down to Slow and Demi.
Finished with the first world, Quick headed on to the game's second chapter at level 28.


_%5BT%2BEng1.10%5D000.jpg)
_%5BT%2BEng1.10%5D005.jpg)
_%5BT%2BEng1.10%5D012.jpg)
_%5BT%2BEng1.10%5D027.jpg)
_%5BT%2BEng1.10%5D017.jpg)
_%5BT%2BEng1.10%5D023.jpg)
_%5BT%2BEng1.10%5D031.jpg)
_%5BT%2BEng1.10%5D036.jpg)
_%5BT%2BEng1.10%5D047.jpg)
_%5BT+Eng1.10%5D048.jpg)
_%5BT+Eng1.10%5D125.jpg)
_%5BT+Eng1.10%5D136.jpg)
_%5BT+Eng1.10%5D145.jpg)
_%5BT+Eng1.10%5D146.jpg)
_%5BT+Eng1.10%5D148.jpg)
_%5BT+Eng1.10%5D159.jpg)
_%5BT+Eng1.10%5D181.jpg)
_%5BT+Eng1.10%5D180.jpg)
_%5BT+Eng1.10%5D191.jpg)
_%5BT+Eng1.10%5D196.jpg)
_%5BT+Eng1.10%5D201.jpg)
_%5BT+Eng1.10%5D204.jpg)
_%5BT+Eng1.10%5D219.jpg)
_%5BT+Eng1.10%5D228.jpg)
_%5BT+Eng1.10%5D233.jpg)
_%5BT+Eng1.10%5D236.jpg)
_%5BT+Eng1.10%5D239.jpg)
_%5BT+Eng1.10%5D241.jpg)
_%5BT+Eng1.10%5D247.jpg)
_%5BT+Eng1.10%5D250.jpg)
_%5BT+Eng1.10%5D253.jpg)
_%5BT+Eng1.10%5D261.jpg)
_%5BT+Eng1.10%5D264.jpg)
_%5BT+Eng1.10%5D268.jpg)